


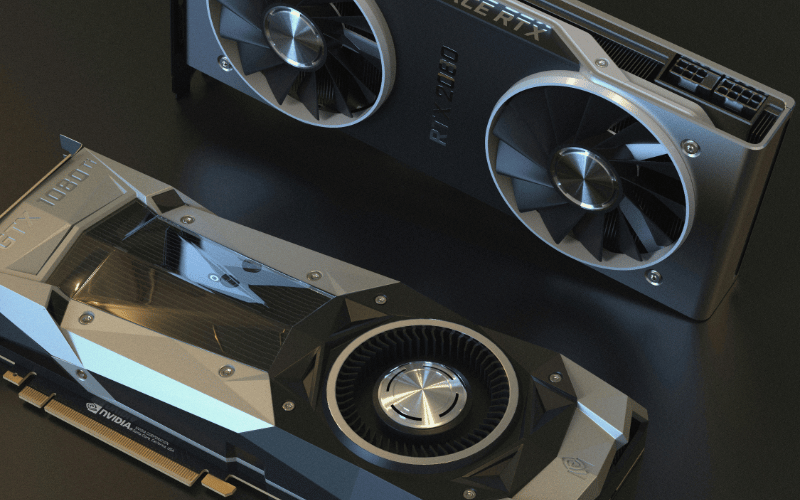
If you’ve ever played a game where the world runs smoothly even though most of it is off-screen, you’ve already seen the payoff of good clipping. GPU triangle clipping is one of those quiet, unglamorous jobs the hardware does constantly — millions of times per second — and nobody thinks about it until something breaks.
My background is GPU server chassis. Day to day, that means airflow, thermal headroom, and making sure a rack full of cards stays cool under sustained load. That lens shapes how I think about clipping. Every triangle a GPU skips is a tiny bit less heat, a tiny bit less power, and a tiny bit more headroom for the work that actually matters. Wasted computation shows up as warmth. Clipping is one of the ways the hardware keeps that waste in check.
Here’s what this article covers: what GPU triangle clipping is, how it works step by step, why it matters for performance, and how to actually manage it in a real project.
The Fundamentals of GPU Triangle Clipping
GPU triangle clipping is a hardware process that trims geometry sitting outside the visible camera view. Put more simply: the GPU cuts off the parts of triangles you can’t see so it doesn’t waste time drawing them.
The central idea is the viewing frustum. Think of it as a pyramid with the tip removed — that’s the 3D volume your camera can actually see. Six planes bound that volume: left, right, top, bottom, near, and far. Anything outside those boundaries isn’t visible, and there’s no reason to render it.
When triangles enter the pipeline, the GPU sorts them quickly into three groups:
- Fully inside the frustum — pass them through unchanged.
- Fully outside the frustum — discard them entirely.
- Partially crossing a boundary — these need actual clipping.
That third group is where the work is. The GPU has to slice those triangles along the frustum edges so only the visible portion continues.
This happens during the primitive assembly stage of the graphics pipeline — after vertices have been processed, but before pixels are drawn. The payoff is straightforward: less work handed to the rasterizer, lower power draw, faster renders.
Takeaway: Clipping is the GPU refusing to paint what the camera can’t see.
How the Clipping Process Works
The clipping math sounds intimidating, but the logic is pretty clear once you walk through it.
It all starts in clip space. When the vertex shader finishes, it hands off each vertex position in homogeneous clip coordinates — a four-component vector called a vec4. These values exist after the projection transform but before the final mapping to screen space.
In clip space, the GPU tests each vertex against the clip planes. APIs like OpenGL define a canonical range: after the perspective divide, coordinates inside the view fall between -1 and 1 on each axis. A vertex inside that range is visible. Outside it, something needs to happen.
Once clipping wraps up, the surviving geometry converts to normalized device coordinates (NDC). That’s the standardized space the rasterizer uses to figure out where everything lands on screen. Doing the conversion after clipping keeps the math clean and avoids edge cases.
Cutting a Triangle Along a Plane
Here’s the part people don’t always expect. When a triangle straddles a clip plane, the GPU doesn’t just throw it out. It calculates the exact points where the triangle’s edges cross the plane and creates new vertices at those intersections.
That clipped triangle can turn into a convex polygon with four or five sides. Since the rasterizer can only handle triangles, the GPU triangulates that polygon back into two or three proper triangles. Those are what get drawn.
One side effect worth knowing: clipping can temporarily increase your local triangle count. A single triangle straddling a screen corner might become two or three after the cut.
Near and Far Clipping Planes
The near and far planes deserve special attention because they cause the most common headaches.
The near plane sits just in front of the camera. The far plane marks the maximum render distance. They exist because the depth buffer has finite precision — it can only accurately represent a limited range of distances. Geometry too close or too far breaks that precision. Clipping against these planes keeps everything in a range the hardware handles reliably.
Guard-Band Clipping
Full clipping — slicing a triangle, generating new vertices, retriangulating — isn’t free. So GPUs use a shortcut called the guard band.
The guard band is an expanded region around the actual viewport. When a triangle pokes slightly beyond the screen edge but still falls within the guard band, the GPU skips the full clip process. The rasterizer handles it directly and simply discards any pixels that land outside the visible area.
This eliminates a lot of unnecessary vertex generation for triangles near screen edges. On a busy GPU, those savings add up fast — and anything that trims workload also trims heat output.
Takeaway: Clipping tests geometry in clip space, surgically cuts crossing triangles, and uses the guard band to avoid that surgery whenever it can.
Why Clipping Matters for Performance
Clipping isn’t just good hygiene. It has a real, measurable effect on performance.
First, it shrinks the rasterizer’s workload. The rasterizer converts triangles into fragments — potential pixels — and every fragment costs processing time. Clipping removes off-screen geometry before the rasterizer ever sees it, so fewer fragments get generated and shaded.
Second, it saves memory bandwidth. Bandwidth is one of the tightest constraints on a busy GPU. Every byte spent shuffling data for invisible geometry is a byte wasted. Clipping cuts that waste at the source.
Third, it prevents a class of visual glitches. Without proper near-plane clipping, geometry crossing behind the camera can wrap around and smear across the screen in weird ways. It also helps avoid Z-fighting, where surfaces flicker because the depth buffer can’t tell them apart.
Why It Matters Even More on Mobile and Integrated GPUs
This is where the chassis perspective really comes in. Mobile and integrated GPUs operate under tight power and thermal constraints. There’s no deep fan stack, no generous airflow path, no thermal headroom to burn through. Every wasted operation becomes heat the device has to shed, and if it can’t shed it fast enough, the chip throttles.
Efficient clipping helps constrained GPUs stay within their thermal envelope. Less wasted rasterization means less power draw, which means sustained performance rather than a thermal wall.
Hardware vs Software Clipping
Modern GPUs clip in dedicated hardware, and that makes a huge difference. Software clipping — pushing the work to the CPU — was the old approach, and it was a meaningful bottleneck. Hardware-accelerated clipping runs in parallel with the rest of the pipeline, so the cost is nearly invisible. That’s why we let the silicon handle it.
Takeaway: Clipping cuts rasterizer load, saves bandwidth, prevents visual bugs, and pays the biggest dividends where thermal headroom is tight.
Clipping vs Culling: Knowing the Difference
Clipping and culling are easy to confuse. Here’s the short version: clipping reshapes individual triangles, culling removes entire pieces of geometry. They’re working toward the same goal but at different levels of the pipeline.
The main types worth knowing:
- Back-face culling drops triangles that face away from the camera. Most solid objects only show their front-facing surfaces, so there’s no point processing the back-facing ones. This test is about orientation, not location.
- Frustum culling is a coarse, object-level check. Before geometry hits the GPU’s clipping stage, the engine tests whether entire meshes sit outside the frustum. If a building is behind you, there’s no point sending it down the pipeline at all.
- Occlusion culling skips objects blocked by other geometry. If a solid wall separates the camera from a room full of objects, those objects don’t need to be rendered.
The order these run in matters. Frustum culling is early and broad, knocking out whole objects. Clipping is later and fine-grained, trimming whatever triangles made it through. Clipping runs late on purpose — by that stage, geometry has already been transformed into clip space, which is where the intersection math is cleanest.
Think of it as a funnel. Frustum culling removes the obvious misses. Occlusion culling drops the hidden geometry. Back-face culling tosses wrong-facing triangles. Clipping does the careful trimming on everything left. Each stage hands a smaller, cleaner set of work to the next.
Takeaway: Culling discards whole objects or wrong-facing triangles. Clipping reshapes the ones that straddle a frustum boundary.
Common Issues and Artifacts
Clipping usually runs silently in the background. When it misbehaves, you notice immediately.
The most familiar problem is near-plane clipping gone wrong. When a camera gets too close to a surface and the geometry crosses the near plane, part of it disappears — and you can suddenly see inside the hollow model. If you’ve ever pushed a game character into a corner and watched the wall vanish to reveal an empty shell, that’s exactly what happened.
Precision errors are trickier. The intersection math relies on floating-point arithmetic, and floating-point isn’t infinitely accurate. When coordinates are very large, or a vertex lands right on a clip boundary, the math can drift. The result is tiny holes or cracks in geometry that should be seamless.
There’s also the clipping-through effect, where a long thin triangle disappears entirely because the intersection calculation couldn’t handle it gracefully. Slivers and extreme aspect ratios are the usual suspects.
Most of these problems trace back to scale. Scenes with objects placed millions of units from the world origin lose floating-point precision across the board, not just in clipping. Sensible scene scales and proper projection setup keep coordinates in a safe range and prevent the worst of it.
Developers tune around these constraints by adjusting clip plane distances — pulling the near plane back slightly reduces artifacts, but also limits how close the camera can get. It’s a constant tradeoff between visual fidelity and rendering stability.
Takeaway: Most clipping artifacts stem from cameras getting too close or from world-coordinate scales that push floating-point precision to its limits.
Advanced Note: Custom Clipping in Shaders
If the automatic clipping the GPU provides isn’t enough, you can define your own. This section is aimed at more experienced developers — beginners aren’t missing anything critical if they skip it.
User-defined clip planes can be set inside a vertex or geometry shader. These cut geometry along arbitrary planes that have nothing to do with the camera frustum — handy for effects the built-in system can’t produce on its own.
The classic use case is slicing a model open for a cross-section view. You define a plane, tell the shader to clip anything on one side, and you get a clean cut through whatever geometry crosses it.
At the fragment level, a discard statement in a fragment shader throws out individual pixels based on any condition you define — a mask texture, a distance threshold, a procedural pattern. It’s not the same as geometric clipping, but it achieves a similar “remove this” result.
The cost is real, though. Custom clipping adds work per vertex or per fragment, and discard in particular can interfere with early-depth optimizations that the GPU normally gets for free. Use custom clipping where you genuinely need it, and rely on the built-in hardware clipping everywhere else.
Takeaway: Custom clip planes and fragment discarding unlock interesting effects, but they carry a cost. Use them deliberately, not by default.
GPU Triangle Clipping FAQs
What is the difference between clipping and scissoring?
Clipping cuts triangles against the 3D frustum planes and generates new geometry along those edges. Scissoring is a flat 2D test that discards pixels falling outside a defined rectangular region on screen, after rasterization. Clipping reshapes 3D geometry. Scissoring masks 2D pixels. They solve different problems.
How do near and far clipping planes affect game visuals?
The near plane defines the closest point the camera renders. The far plane defines the farthest. Both exist because the depth buffer can only handle a limited precision range. Set the near plane too close and you lose depth precision on distant objects. Set the far plane too far and distant surfaces start flickering.
Does triangle clipping happen before or after vertex shading?
After. The vertex shader processes each vertex first and outputs its position in clip space. Then the GPU tests primitives against the clip planes and clips any that cross them. Only after clipping does the geometry proceed to normalized device coordinates and rasterization.
Can modern GPUs skip clipping for small triangles?
Often, yes. The guard band lets the GPU bypass the full clip process for triangles that sit mostly on-screen. If a triangle fits inside the guard band even though it crosses the viewport edge, the rasterizer handles it directly and simply drops pixels outside the visible area. Less work, same result.
Why do objects sometimes disappear at the very edge of the screen?
Usually it’s near-plane clipping or a floating-point precision issue. Geometry that crosses the near plane can get aggressively clipped, and thin or long triangles at the edges of the frustum are especially vulnerable. Extreme world-space coordinates make this worse by degrading precision.
How does the guard band improve clipping performance?
It gives the GPU a buffer zone around the viewport. Triangles that poke slightly past the screen edge but stay within the guard band skip the expensive process of being cut into new triangles. The rasterizer handles them directly and discards off-screen pixels. This reduces vertex generation and speeds up rendering near the edges.
Practical Workflow and Takeaways
In practice, you rarely interact with the clipping hardware directly. You control it through your camera settings — specifically, the near and far clip plane values.
In Unity or Unreal, every camera exposes these settings. Getting them right for your scene eliminates most clipping-related issues before they start.
The near plane is the one that bites people most often:
- Too low (too close to the camera) — your depth buffer precision spreads too thin, and distant surfaces start Z-fighting or flickering.
- Too high (too far from the camera) — objects that should be visible at close range get clipped away, creating noticeable pop-in.
For most scenes, a near plane somewhere between 0.1 and 1.0 units is a reasonable starting range, but the right value depends entirely on your scene’s scale. Test it. Don’t just leave the engine default and hope for the best.
For performance, the practical goal is minimizing how many triangles straddle the frustum boundary. Cleaner level geometry, sensible draw distances, and good asset placement all reduce the number of triangles that need clipping at any given frame.
A few habits worth building:
- Do keep your world coordinates reasonable. Placing objects millions of units from the origin erodes floating-point precision across the board.
- Do test camera behavior in tight corners and narrow spaces. Near-plane issues tend to hide until someone runs a character into a wall.
- Don’t extend the far plane farther than your scene needs. It only costs depth precision without adding visible benefit.
- Don’t use fragment discarding as a substitute for geometry clipping when the hardware version would do the same job at lower cost.
Understanding these limits pays off on every platform. A scene that runs clean on a desktop GPU with a generous thermal budget can easily stall on a mobile chip with nowhere to put the heat. Building with clipping in mind from the start keeps your work efficient regardless of where it runs.
Effective clipping is a backbone of stable, fast 3D graphics — always has been, regardless of which engine or API sits on top. Get the fundamentals right, keep your near plane sensible, stay away from extreme coordinate scales, and let the hardware do what it was built to do.
The easiest first step: open your project, pull up your camera settings, and verify that the near and far clip planes actually match the scale of your scene. That one check catches more issues than most people expect.
