Due to increased workload across industries, servers, especially high-performance ones, have started integrating GPUs with parallel processing capabilities because of the thermal limitations of the systems. Maintaining the integrity, efficiency, and reliability of GPUs within server enclosures requires effective thermal control. This article discusses the principal aspects responsible for GPU overheating, the consequences of insufficient cooling on the operational efficiency of the server, and the significant steps that can be taken to reduce heat dissipation. From understanding the intricacies of airflow to using superior cooling systems, we provide a holistic approach to the issue of overheating the GPU within the servers. This article offers solutions to mitigate the problem, whether through hardware or software changes, considering even the most intensive workloads.
Why Does a GPU Overheat?

An overheating GPU is typically the result of insufficient cooling strategies, a processor-heavy workload, or poor thermal design. Regarding the inadequacies of cooling systems, insufficient airflow in the server chassis, dust accumulation on heatsinks and fans, poor thermal paste application, and failures in the cooling systems, such as malfunctioning fans or liquid coolers, contribute to heating issues. Also, A GPU is highly strained when performing intensive computations such as rendering, deep learning, or high-performance computing. These combined make raising temperatures much easier than cooling, leading to high operating temperatures for prolonged periods.
Understanding the Causes of GPU Overheating
I discovered that the causes for failing systems stem from poor thermal management with heavy workloads. High workload issues such as high dust accumulation in fans and heatsinks negatively affect airflow, and poor thermal paste application impacts heat transference between the GPU and the cooler. If the cooling system is too old, degraded, or insufficient, thermal buildup becomes eminent. Gaming and AI-powered programs like machine learning further worsen the issue by driving GPU performance to its limit, which results in overheating. Working in tandem with high-performance components reveals additional problems, such as inadequate maintenance, poor thermal paste application, and ineffective cooling.
The Impact of Thermal Throttling on Performance
Thermal throttling dramatically influences the quality of the work done by a GPU or CPU while under a heavy workload. Suppose a GPU or CPU exceeds the temperature limit. In that case, thermal throttling automatically reduces the device’s clock speed to avoid overheating and consequently protects the device from suffering permanent injury. While thermal throttling is beneficial for safeguarding hardware, it also causes a drop in performance, especially with tasks such as gaming and rendering, where frame rates drop and the speed at which computations are performed declines sharply.
Most GPUs begin their thermal throttling features between the temperature range of 85°C and 95°C. However, these limits tend to vary from model to model and also by the manufacturer. Most CPUs also initiate their throttling around the same range of temperatures, such as 90°C to 100°C (for example, the Intel Core i7-12700K will have its throttling feature become active at temperatures above 100 °C based on its thermal design). Such parameters may vary depending on the efficiency of the cooling system in use, the airflow, and the temperature of the surroundings.
For the adverse effects of thermal throttling, I suggest devices with optimized cooling solutions that feature high-performance fans, liquid cooling systems, or components that can be undervolted. Better airflow can also improve case cooling by using intake and exhaust fans, ensuring that the heatsinks are clean and dust-free and proper thermal paste is used. Enthusiasts who monitor the hardware regularly use tools such as MSI Afterburner and HWMonitor to monitor clock speeds and temperatures to manage the system and prevent the system from thermal throttling.
Identifying Signs of Overheat in GPUs
In my experience of monitoring GPU temperatures, I look toward performance benchmarks, artifacts on the screen, and blatant fan over usage to indicate overheating. GPU temperature elevation usually exceeds the 80°C limit, especially when under heavy load. Tracking software such as MSI Afterburner or HWMonitor has proven effective, as they help monitor over and under-heating situations and maintaining hardware longevity and system stability.
How to Optimize Airflow for Better Cooling

To ensure better-cooling airflow, check if your PC case has fans for intake and exhaust. Intake fans should be located in the front or bottom of the case to provide cool air, while exhaust fans should be at the back or top of the case. Also, proper cable management should be implemented to eliminate any airflow obstructions like excess cables. Regularly clean all case filters and fans to ensure airflow is not obstructed by dust. Moreover, make sure your fans are rotating at the correct speed. You can adjust fan curves in BIOS or your monitoring software. If needed, you can replace the fans with better quality ones or add additional fans if the layout of your case allows. This will improve cooling efficiency.
Setting Up Proper Cable Management
Effective cable management is part and parcel of ensuring that the airflow in and out of your PC case is efficient and orderly. This reduces any chances of overheating in the PC case components. Minimally, start by guiding cables through the specific cutouts of the case so that the airflow is unrestricted. Neatly bundle the wires with Velcro or cable ties and attach them to the case’s cable management ‘grommets’ and ‘straps’. The same should be done while securing power supply cables, which must be routed through the least obstructive route to the connection points.
To have the desired results, consider the following:
- Case Design: Select a casing with at least 20mm to 30mm of free space behind the motherboard tray opening to easily route the cables.
- Cable Length: Use wires of just the right size, free from any slack, as they would create a mess.
- PSU Modularity: For ease of cabling, select the appropriate modularity for the power supply, which should be either semi-modular or fully modular.
After each upgrade, periodically inspect the cables and make changes to maintain a tidy arrangement that enhances the setup’s functioning capabilities.
Configuring Case Fans for Maximum Airflow
For maximum airflow, fans should be placed and configured appropriately. I install intake fans at the front or the bottom of the case to ensure that cool air is drawn in, while exhaust fans are installed at the back and the top to release hot air. To reduce dust accumulation, I ensure that the number of intake fans equals the number of exhaust fans so that air pressure is neutral or slightly positive. In addition, depending on the case’s airflow limits and cooling requirements, I also install high-quality fans with high RPM and static pressure ratings. I also set strategic fan curves in the BIOS or control software to the optimum noise-to-performance ratio.
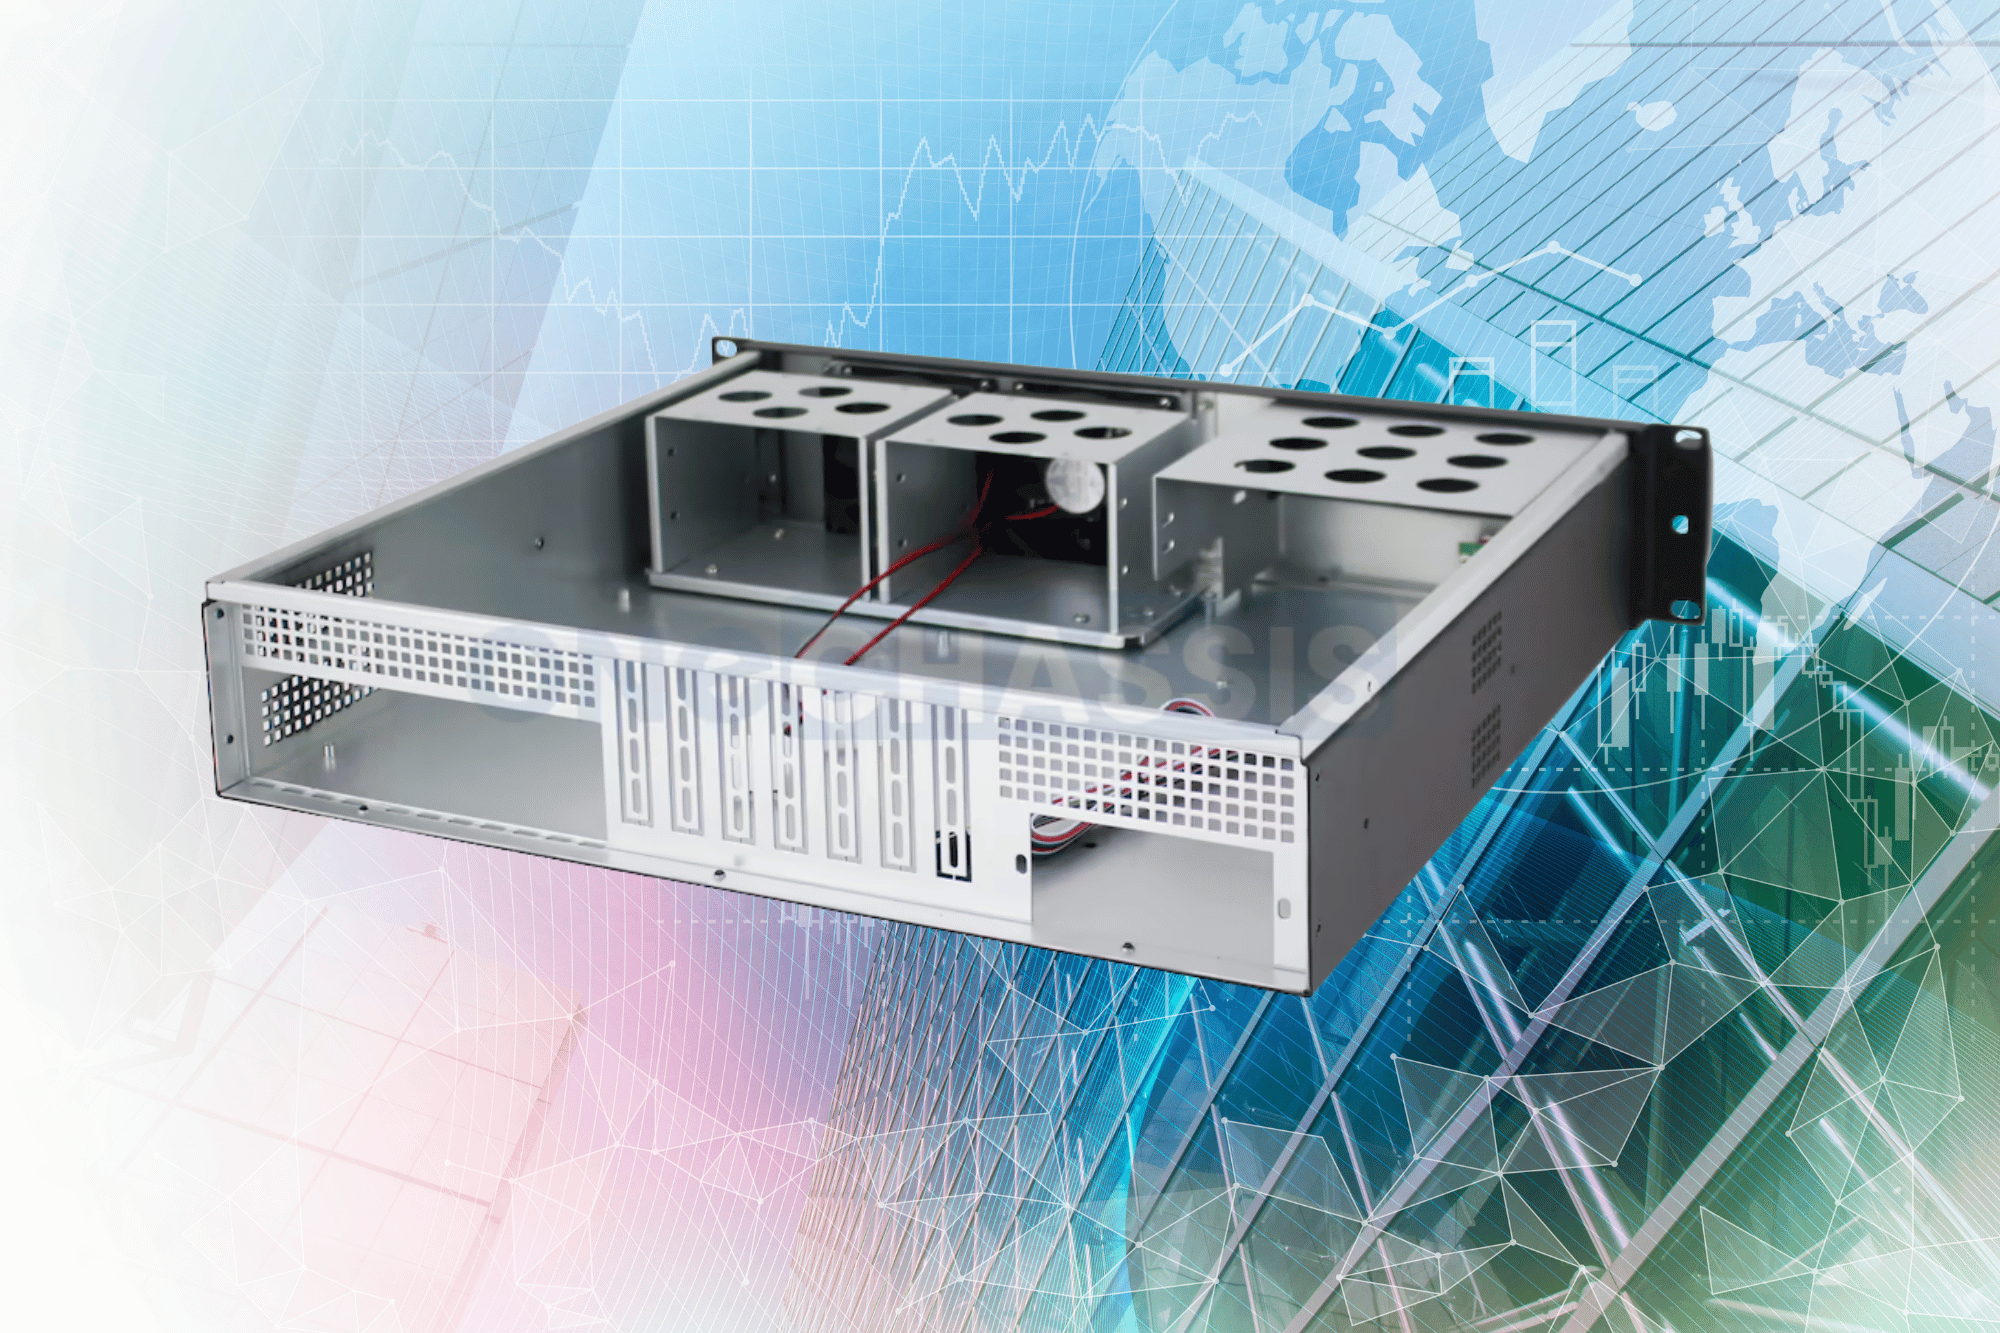
Ensuring Effective Ventilation in Your Server Chassis
To keep the server chassis ventilated properly, I ensure precise airflow by placing the intake and exhaust fans away from each other to avoid turbulence. I aim to double the number of exhaust fans as intake ones. This ratio helps minimize dust ingress; therefore, I try to maintain balanced or positive air pressure. I place high-static pressure fans (≥2.0 mmH2O) for radiators or areas with limited airflow and high airflow fans (≥60 CFM) for the open areas. Constructing cables neatly and using dust filters help reduce disruption to efficiency by enhancing airflow. Relay sensors are used to monitor the temperatures, and the fan curve is adjusted to ensure the system only operates within safe limits, such as keeping the CPU below 80°C while not letting the ambient heat within the chassis exceed 35°C.
What Cooling Systems Can Prevent GPU Overheating?

Different cooling solutions can be used to avoid GPU overheating, and they vary depending on performance needs and environmental conditions. Simple air-cooling using a high-efficiency heatsink and axial or blower-style fans is one of the most common and cost-effective solutions. Easy modifications can be made to improve thermal dissipation when liquid cooling systems can circulate coolant through a closed loop around the GPU. Liquid cooling systems provide superior performance in high-demand applications. Hybrid cooling, which is a combination of air and liquid methods, provides a balance between noise reduction and efficiency. Also, ensuring that there is appropriate case airflow, as well as adequate application of thermal paste between the GPU die and heatsink, is vital for good heat transfer. Due to these methods, GPU temperatures can be kept below critical thresholds. Generally, this is under 85°C during peak workloads.
Comparing Water Cooling vs Air Cooling
Both water and air cooling systems for GPUs have advantages and disadvantages based on their performance, price, and upkeep needs.
Water cooling
Water cooling is advantageous because it provides the best thermal performance and enables the GPU to work at much lower temperatures during maximum utilization. A liquid-cooled system usually consists of a water block for the GPU, a pump to circulate coolant, a radiator for heat, and a fan to blow air through the radiator. Depending on the loop structure and other conditions, these systems can keep GPU temperatures under heavy workloads to somewhere between 50 and 65 degrees celsius. Because of its effectiveness in multi-GPU and overclocked GPU applications, water cooling is better suited for more demanding gaming, 3D modeling, or AI workloads. The downside is that water cooling is more expensive, difficult to set up, and has to be serviced regularly to check for leaks and coolant changes.
Air Cooling
Unlike water cooling, air cooling is straightforward and more economical as it utilizes heatsinks and fans to control the temperatures of the GPU. Current air coolers can maintain the GPU temperature at 70 to 85 degrees Celsius within the load. Compared to water cooling, air cooling has fewer components requiring little maintenance, making it a viable option for most of the standard builds. Nevertheless, it suffers the drawback of reduced thermal effectiveness in performance in ultra-high demand conditions in set scenarios. Moreover, users utilizing air cooling are likely to experience more noise than is the case with liquid cooling since the fans have to run at higher speeds during peak workloads of intensive tasks.
Comparison of Parameters
|
Aspect |
Water Cooling |
Air Cooling |
|---|---|---|
|
Thermal Performance |
50°C – 65°C (under load) |
70°C – 85°C (under load) |
|
Noise Levels |
Lower (depends on pump/radiator fans) |
Higher (fans at maximum speed) |
|
Installation Complexity |
High (requires custom setup) |
Low (plug-and-play design) |
|
Cost |
$150 – $400+ (custom loops or AIO kits) |
$30 – $150 (high-end air coolers) |
|
Maintenance |
Moderate to High (coolant replacement and leak checks) |
Low (dusting fans/heatsinks) |
Like all other processes, each cooling method is suited for specific scenarios. Water cooling is handy for users who require more power and overclocking because of its efficiency and noise-free operation. However, air cooling is a good option for economically constrained users or those who want less complicated maintenance systems.
Benefits of Using Liquid Cooling Solutions
I have often discovered that liquid cooling has better thermal performance than any other method, especially regarding high-end systems and overclocking. It ensures efficient heat dissipation occurs regularly, thus stopping thermal throttling, especially during intensive tasks. Moreover, cooling systems with liquids are much quieter than those with air cooling since the fans do not have to spin out of control to retain moderation of the temperatures. Hence, such systems help create a quieter gaming or work environment. Though the initial setup may require more focus, the enhanced stability and cooling features that aid demanding applications make this a much simpler solution in the long run.
Choosing the Right GPU Cooler for Your Setup
When choosing the proper GPU with the cooler, some factors must always be considered to ensure complete system compatibility, efficiency, and performance. The first step is to check your GPU’s TDP rating. The rating of a GPU cooler refers to the dissipation capability and does not have a direct correlation with TDP. For instance, if your GPU has a TDP of 250W, then a cooler of 300W or above suffices as the workload rating for optimal performance under load.
Always remember to check case dimensions and compatibility with your GPU model next. In Air Cooling, appropriately sized heatsinks need sufficient clearance, and in Liquid Cooling, space is required for mounts that support 120mm, 240mm, or even 360mm radiators based on the fan settings. Always check if your case supports the radiator size corresponding to your selected liquid cooler.
Also, take into account your specific use case. An AIO (All-In-One) liquid cooler or a high-performance air cooler would be the best option for gaming or overclocking as they offer more excellent thermal management. Noise levels also play an essential role; liquid cooling is more efficient at quieter operations when under heavy loads than overclocked air cooler fan units.
Lastly, do not forget to check the mounting bracket of your GPU and the cooling requirements for the VRM (Voltage Regulator Module). Most coolers these days come with adjustable mounting hardware to accommodate many GPU models, but be sure to check the manufacturer’s specs to avoid problems with installation. A cooler with performance, noise level, and compatibility for your system should come first.
How to Use Software Tools to Monitor GPU Temperature

First, download a software tool that tracks the GPU temperature. Some good examples are MSI Afterburner, HWMonitor, and GPU-Z. These tools not only provide temperature monitoring but also allow for the tracking of other metrics like fan speed and power usage. After installing, launch the software and search for the GPU temperature reading, which is usually displayed as part of the main dashboard. To get more information regarding tracking temperature changes, use tools with a graph or log feature. Be sure to have the requisite software for the specific GPU model and have it updated regularly. By monitoring GPU temperature, you can quickly catch potential thermal problems, ensuring your system runs smoothly throughout its workload.
Using MSI Afterburner for Real-Time Monitoring
To set up MSI Afterburner, ensure you download and install it from the official site to guarantee safety and compatibility. After launching the software, you will see its dashboard showcasing real-time data, including GPU temperature, GPU load, clock speed, and fan speed. Ensure the “Hardware Monitor” panel is open because it allows you to check monitor temperatures accurately. In addition, you can set up the fan curves by opening the configuration menu and enabling user-controlled settings. This allows the user to manage GPU cooling proactively based on workload intensity. With this multitude of options, it is evident that MSI Afterburner is a crucial tool to circumvent overheating and sustain maximum GPU performance. Remember, updates to the software are necessary to ensure it remains compatible with the latest GPU drivers.
Setting Custom Fan Speeds to Cool Your GPU
To set custom fan speeds for your GPU using MSI Afterburner, follow these steps:
- Enable User-Defined Fan Control
Open MSI Afterburner and click on the settings gear icon. Navigate to the “Fan” tab and check the box labeled “Enable user-defined software automatic fan control.” This allows you to configure the fan curve behavior manually.
- Adjust the Fan Curve
Once enabled, a fan curve graph will appear. The X-axis represents GPU temperature (Celsius), and the Y-axis represents fan speed (percentage). Configure points along the curve to specify the fan speed percentage at various temperature thresholds. For instance:
-
-
- Below 40°C, set fans to 30% for quiet operations.
- Between 40°C and 60°C, gradually increase fan speeds to 50%-70%.
- Above 80°C, set fan speed to 90%-100% to protect the GPU from overheating.
-
This ensures the GPU fan applies adequate cooling as workload and temperature increase.
- Test Fan Speeds
After setting the curve, apply the changes and monitor system performance under typical workloads. MSI Afterburner’s Hardware Monitor panel helps track real-time GPU temperatures and fan behavior, ensuring the custom settings effectively stabilize temperatures.
- Save and Apply Profiles
Save your configuration to one of MSI Afterburner’s profiles to make it easily reusable. Use the profile hotkeys to switch between multiple configurations for different scenarios, such as gaming or general usage.
You can optimize thermal performance while balancing noise levels by customizing your GPU fan speeds based on temperature thresholds. Ensure all configurations align with your GPU’s manufacturer-recommended temperature and fan speed limits to avoid unnecessary strain on hardware.
Implementing Undervolting to Reduce Heat Generation
Undervolting a GPU consists of reducing core voltage while anchoring stable performance, which will reduce waste heat and power draw. To execute this, I set the right voltage frequency curve in MSI Afterburners’s Curve Editor by changing the voltage value for specific clock speeds. I then stress my settings for stability using benchmarks such as Heaven or 3DMark and make sure there are no performance drops or crashes.
Because removing excess voltage for a GPU does not require other additional steps, it is heat efficient. That said, I like to play it safe so I never go beyond the GPU manufacturer’s stated voltage limits for the hardware’s safety.
When Should You Consider Replacing Thermal Paste?

You should replace the thermal paste when there are high signs of thermal degradation; this can be seen from the very high temperature. With time, the thermal paste can dry or become ineffective, leading to poor heat movement between the processor and GPU to the heatsink. If your system gets thermal throttling very often, gets overheated regularly repairs, or its age is more than 2 to 3 years, inspecting and reapplying thermal paste can help it cool more efficiently. In addition, replacing thermal paste is very important after removing or adjusting the heatsink’s position to ensure thermal contact is established. Use good quality thermal compound and follow the manufacturer’s application to ensure optimal results.
Signs That Your Thermal Paste Needs Replacement
- Monitoring System Temperatures: If I notice my CPU or GPU activity running at a higher wattage while maintaining a clean and well-ventilated area, my first suspicion would be a failing thermal paste application.
- Old Thermal Paste: Since the last application was practically 2-3 years ago, I would definitely consider reapplying the thermal paste for better results.
- Overheating: A noticeable decrease in my system’s performance combined with a higher thermal load indicates that I should reapply thermal paste or, at the very least, change my system settings.
- Applying Thermal Paste: It is worth noting that once I remove or replace the heatsink for any non-heat-related changes to my system, I must also replace my thermal paste.
Whether or not the thermal activity performance is constant can be maintained by monitoring these factors.
Steps for Safely Replacing the Thermal Paste
- Power Down and Disassemble
First, I turn off the system, unplug all power cables, and discharge any remaining static electricity by touching a grounded metal surface. Depending on the application, I then carefully remove the necessary components to access the CPU or GPU.
- Remove the Old Thermal Paste
Using isopropyl alcohol (at least 90% concentration) and a lint-free cloth or cotton swabs, I clean off the old thermal paste from both the processor and the heatsink. I ensure that all residue is removed to avoid interfering with heat transfer. Careful handling is critical to prevent scratching or damaging the surface.
- Apply the New Thermal Paste
I apply a small, pea-sized amount of high-quality thermal paste (typically a compound with good thermal conductivity above 8 W/mK) to the center of the processor. For larger chips, such as GPUs, I evenly spread a thin layer over the entire surface if required by the manufacturer’s specifications.
- Reattach the Heatsink
Ensuring proper alignment, I securely reattach the heatsink to the processor, applying even pressure to distribute the paste evenly. I double-check all screws are tightened according to the specified torque guidelines to avoid overtightening or causing damage.
- Reassemble and Test
After reconnecting all components and cables, I power the system and monitor temperatures using hardware monitoring software to ensure thermal performance has improved. Depending on the processor model, typical safe CPU operating temperatures range between 30–40°C at idle and 60–80°C under load.
By following these steps meticulously, I ensure the replacement process is efficient and maintains my system’s long-term performance.
Selecting High-Quality Thermal Paste for Optimal Performance
To understand thermal paste selection well, knowing how different materials affect thermal conductivity is essential. After analyzing several thermal pastes, my results indicate that metal oxide and ceramic-infused thermal pastes have high thermal transfer efficiency, while liquid metal has the highest performance. A precaution with liquid metal is that it is conductive, so it must be applied cautiously. Aside from performance, I consider ease of application, longevity, reviews from other users, and, most importantly, if there are potential risks of corrosion or damage to the components of my system, like aluminum or nickel-plated heatsinks.
References
-
Thermal Management of GPU-Enabled Servers in Data Centers – This article discusses warm-water direct-to-chip liquid cooling solutions and their efficiency in managing server heat.
-
GPU Liquid Cooling Guide: 7 Considerations, Tips, and Tools – A comprehensive guide on liquid cooling systems, including tips and tools for effective GPU cooling.
-
6 Best Practices for Optimizing Data Center Cooling – Offers practical advice on optimizing cooling in data centers, which can be applied to GPU-enabled servers.
Frequently Asked Questions (FAQ)
Q: Why does my GPU overheat in a server chassis?
A: GPU overheating in a server chassis can be caused by inadequate cooling, poor ventilation, or excessive load on the graphics card. Ensuring proper airflow and using efficient cooling methods can help manage the temperature of your GPU.
Q: How can I improve the cooling performance of my GPU?
A: To improve cooling performance, consider increasing the fan speed, installing additional heatsinks, or using thermal pads. Ensuring your pc case has proper airflow can also help keep your GPU cool.
Q: What role does proper airflow play in managing GPU temperatures?
A: Proper airflow is essential for dissipating hot air generated by the GPU. It helps exhaust heat effectively and ensures that the GPU’s temperature remains within safe limits. Ensure your server chassis has adequate vents and fans to facilitate this process.
Q: Can undervolting my GPU help reduce overheating?
A: Undervolting your GPU can significantly lower its temperature by reducing the electrical power it consumes, reducing the heat generated by the GPU core.
Q: Is it safe to increase the fan speed of my GPU?
A: Increasing the fan speed is generally safe and can help cool the GPU more effectively. However, it may lead to increased noise levels. Using tools like MSI Afterburner allows you to adjust fan speeds safely.
Q: How does overclocking affect the temperature of my GPU?
A: Overclocking increases your GPU’s performance by making it work harder, which also results in increased heat output. This can cause the GPU’s temperature to rise significantly, necessitating efficient cooling solutions.
Q: What are the benefits of using thermal pads on a GPU?
A: Thermal pads enhance the contact between the GPU chip and its heatsink, improving heat dissipation and helping to lower gpu temperatures more effectively.
Q: How can I prevent hot air from building up inside my server chassis?
A: To prevent hot air buildup, ensure your server chassis has a well-designed exhaust system. Regularly clean dust from the fans and vents using compressed air to maintain efficient cooling performance.
Q: Are there specific settings for AMD and NVIDIA GPUs to manage overheating?
A: AMD and NVIDIA provide software tools to manage fan settings and monitor GPU temp. You can use Radeon Software for AMD GPUs, while NVIDIA offers GeForce Experience for similar functionalities.
Q: Can a blower-style GPU help with cooling in a server chassis?
A: Blower-style GPUs can be beneficial in server chassis as they exhaust hot air directly out of the case, preventing it from circulating inside and affecting the temperature of the CPU and GPU.