


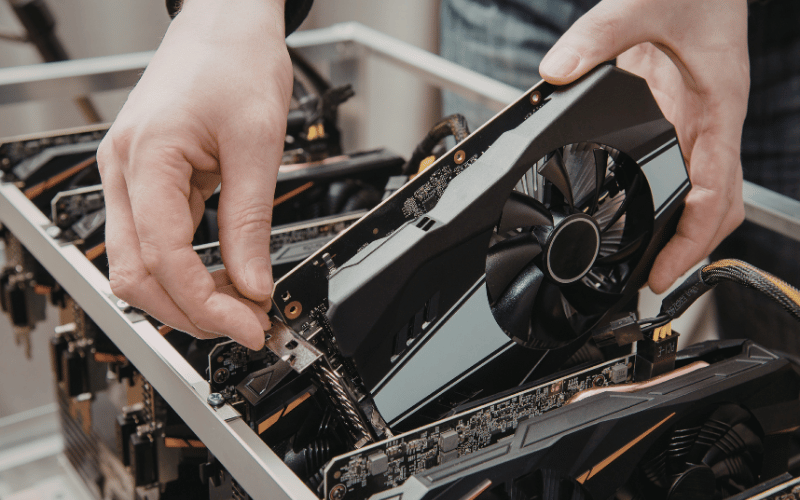
The relationship between your Graphics Processing Unit (GPU) and motherboard is symbiotic but fragile, relying heavily on the physical connection of the PCIe x16 slot and intricate power delivery systems. While the motherboard acts as the central nervous system, routing data and electricity to components, the GPU is often the heaviest and most power-hungry organ in the system. This connection is the primary failure point where physical stress or electrical faults can occur, potentially turning your expensive gaming rig into a paperweight. Understanding this mechanical and electrical bond is the first step in diagnosing why your system has suddenly gone dark.
Unfortunately, GPUs can damage motherboards in several ways, ranging from gradual physical stress to catastrophic electrical failures. The most common physical culprit is “GPU sag,” where the immense weight of modern cards warps the PCIe slot over time, breaking delicate electrical traces. Electrical issues are even more immediate; a short circuit within the graphics card can send a surge back through the PCIe lane, frying the motherboard’s chipset or voltage regulation modules (VRMs). Additionally, power surges from a faulty power supply unit (PSU) can travel through the GPU’s power cables and arc into the motherboard, causing irreversible damage to sensitive components.
Diagnosing these issues requires a systematic approach because symptoms of a dead GPU often mimic a dead motherboard, and vice versa. Jumping to conclusions can lead to replacing the wrong part, wasting both time and money. By following a structured troubleshooting process—starting with visual inspections and moving to isolated testing—you can accurately determine if the GPU was the aggressor that took down your motherboard. This guide will walk you through the necessary steps to identify the root cause and assess the extent of the damage.
Physical Inspection of the Hardware
The first step in diagnosing potential hardware failure is a thorough visual examination of the PCIe x16 slot itself. Remove the GPU carefully and shine a bright light into the slot where the card was seated. You are looking for any physical deformities, such as cracks in the plastic housing or, more alarmingly, signs of burning or melting. If the GPU shorted out, it often leaves scorch marks on the plastic or the gold contact pins inside the slot. Any visible charring here is a definitive sign that the motherboard has sustained critical damage.
Next, inspect the area surrounding the slot for signs of “GPU sag” or PCB warping. Heavy graphics cards can exert significant force on the slot, causing the motherboard’s Printed Circuit Board (PCB) to bend or flex. Look closely at the traces—the tiny copper lines running across the board—near the rear of the PCIe connector. If the board has flexed too much, these traces may have hairline cracks that sever the data connection. This type of damage is often subtle but is a common cause of motherboard failure in systems lacking proper support brackets.
You should also use your nose as a diagnostic tool; smell the area near the motherboard’s Voltage Regulator Modules (VRMs) and the PCIe slot. A distinct, acrid smell of burnt electronics usually indicates a blown capacitor or MOSFET. Visually inspect these small components for discoloration or charring. If a GPU draws excessive power through the slot rather than its auxiliary cables, it can overload these motherboard power-delivery components, causing them to fail catastrophically and leaving visible burn marks or a lingering odor.
Don’t forget to examine the pins inside the PCIe slot itself. Use a magnifying glass if necessary to check for bent, broken, or misaligned pins. Sometimes, inserting a card forcefully or at an odd angle can crush these delicate metal contacts. Even a single bent pin can prevent the GPU from communicating with the CPU or cause a short circuit. Additionally, check for debris, dust, or thermal paste that might have fallen into the slot, blocking the connection.
Finally, scan the motherboard for bulging or leaking capacitors, particularly in the expansion area near the GPU. While modern motherboards use solid-state capacitors that rarely burst, older or lower-quality boards may still use electrolytic caps that can fail. A bulging top or brownish fluid leaking from the base indicates a failed capacitor. If this failure occurred near the PCIe slot, it suggests that electrical instability from the GPU interaction may have been the cause.
Isolated Component Testing
To truly confirm if the motherboard is the victim, you must test the GPU in a completely different, known-good PC. This is the “gold standard” of isolation testing. Install your graphics card into a secondary system that you know works perfectly. If that system boots up and displays an image without issues, your GPU is functional, pointing the finger back at your original motherboard. However, if the second system fails to boot or exhibits the same artifacts, the GPU is likely the faulty component, though it doesn’t rule out that it may have taken the motherboard with it.
If your Central Processing Unit (CPU) has integrated graphics (an iGPU), remove the dedicated graphics card entirely and plug your monitor directly into the motherboard’s display output. Clear the CMOS to reset BIOS settings to default, ensuring the system attempts to use the iGPU. If the computer boots successfully and remains stable using the integrated graphics, you have confirmed that the core components of the motherboard (CPU, RAM, and power) are intact. This isolates the issue to the dedicated GPU or the PCIe slot it occupies.
Another crucial test is to move the GPU to a secondary PCIe slot on the same motherboard, usually an x8 or x4 slot lower down the board. While these slots offer less bandwidth and lower performance, they are wired separately from the primary x16 slot. If the system boots and the GPU works in the lower slot but not the top one, you have confirmed that the primary PCIe slot is physically or electrically damaged. This is a classic symptom of a motherboard that has been “broken” by a GPU, usually due to physical stress or a localized short.
Finally, you should swap the power supply cables powering the GPU to rule out a faulty rail on your PSU. Sometimes, a motherboard appears dead, or a GPU seems to be broken, simply because the specific VGA power cable has failed or a rail on the power supply has tripped. Use a different set of PCIe power cables from your PSU if it has modular power connectors. If the issues persist after swapping cables, the fault is almost certainly with the hardware (GPU or Motherboard) rather than the power delivery entering the card.
Diagnostic Feedback and Signals
Modern motherboards are equipped with diagnostic tools designed to tell you precisely what is wrong during the Power-On Self-Test (POST). If your board has a two-digit POST code display, consult your manual to interpret the hexadecimal code shown when the boot hangs. Codes related to “VGA initialization,” “PCIe resource,” or “Display adapter” indicate the system halts precisely when trying to talk to the GPU. For boards with simple debug LEDs (usually labeled CPU, DRAM, VGA, BOOT), a solid light next to “VGA” indicates that the motherboard cannot detect or initialize the graphics card.
If your motherboard lacks visual indicators, listen for beep codes via the system speaker. A specific pattern of beeps—often one long beep followed by two or three short beeps—is the universal auditory distress signal for a video system failure. This indicates that the motherboard is receiving power and the CPU is functioning, but the system cannot establish a visual output. Hearing this code confirms that the motherboard logic is working enough to diagnose the missing GPU, which might imply the slot is dead or the card is fried.
Pay close attention to the monitor’s behavior versus the system’s behavior. If the fans spin up, the lights turn on, and you hear the Windows startup sound, but the screen says “No Signal,” the motherboard is likely functioning correctly, and the issue is strictly with the video output. However, if the monitor stays in standby and the system power cycles (turns on and off repeatedly) or the fans twitch without entirely spinning up, this suggests a deeper motherboard-level failure, possibly caused by a short circuit in the GPU that prevents the power delivery system from initializing.
Software and BIOS Verification
Suppose you can get the system to post using integrated graphics or a secondary GPU, head straight into the BIOS/UEFI setup utility. Navigate to the “Board Explorer” or “PCIe Configuration” section to see what is plugged into each slot. If your primary GPU is installed and powered but shows as “Empty” or “Not Detected” in the BIOS map, the electrical connection is severed. This confirms that the motherboard cannot “see” the device, pointing to a dead PCIe slot or a dead card controller.
Boot into Windows using the integrated graphics or a secondary card and open Device Manager. Look under “Display Adapters” to see if the suspect GPU is listed. Sometimes, a damaged card will appear, but with a generic name like “Microsoft Basic Display Adapter.” If it doesn’t appear at all, scan for hardware changes. A complete absence from Device Manager, despite the GPU being physically installed, reinforces the diagnosis of a hardware-level disconnection between the GPU and the motherboard.
If the card is detected but shows a yellow warning triangle, right-click and check the error status. “Code 43” is a notorious error indicating that Windows has stopped the device due to a reported problem, often a sign of hardware failure within the GPU itself. While this usually points to the card, if multiple known-good cards throw Code 43 in that specific motherboard slot, the motherboard’s PCIe controller is likely the culprit.
Finally, verify the motherboard’s stability without the suspect GPU installed. Run a stress test like Prime95 (for CPU) and MemTest86 (for RAM) using the integrated graphics. If the motherboard runs stably for hours under load without the dedicated GPU, you have validated that the rest of the board’s subsystems are healthy. This isolation confirms that the instability was introduced solely by the presence of the graphics card or the specific PCIe slot it uses.
Preventive Measures and Final Actions
Prevention is far cheaper than replacement, and the most effective way to save your motherboard from GPU damage is to mitigate “GPU sag.” Modern graphics cards are massive, heavy bricks of copper and plastic that exert tremendous leverage on the PCIe slot. Installing a GPU support bracket—either a simple stand or a bracket that screws into the expansion slots—removes this weight from the motherboard entirely. This simple $15 accessory can prevent the PCB warping and trace cracking that slowly kills motherboards over time.
Ensure that your installation technique is flawless to prevent electrical shorts or pin damage. Always make sure the GPU is seated fully and evenly in the slot, and that the retention clip at the back of the PCIe slot clicks audibly into place. A card that is partially unseated can cause arcing across pins or ground-out connections. Additionally, never force a card into a slot; if it doesn’t slide in easily, check for obstructions. Securing the card firmly to the case bracket with screws is also mandatory to keep it immobile.
If your diagnostics confirm that the motherboard or GPU is dead, stop attempting DIY repairs that involve soldering or baking components unless you are a trained professional. Continuing to power on a shorted system risks damaging other elements, such as the CPU or storage drives. If the components are under warranty, initiate an RMA (Return Merchandise Authorization) process immediately. Be honest about the symptoms but avoid admitting to user error unless certain; simply stating “the system no longer posts with this card” is usually sufficient to start the claim.
Onechassis Solutions for GPU-Optimized Systems
When building or repairing a system that relies on high-performance graphics, the chassis you choose plays a pivotal role in hardware longevity. Onechassis offers a range of industrial-grade enclosures, including Rackmount Cases, Server Cases, and specialized GPU Server Cases, explicitly designed to handle the physical and thermal demands of modern computing. Unlike standard consumer cases, these products are engineered with reinforced structural integrity to support the weight of heavy GPUs without transferring stress to the motherboard, effectively eliminating the risk of sagging and physical damage.
For enterprise applications, AI training, or rendering farms, Onechassis provides 4U to 10U GPU Server Cases that can house multiple graphics cards simultaneously. These cases are built with robust retention mechanisms and support bars that secure cards at both the front and rear, ensuring zero movement during operation or transport. Furthermore, they offer Liquid-Cooled GPU Server Cases that remove the heavy heat sinks from the cards entirely, reducing weight and drastically improving thermal performance to protect VRMs and motherboard components from heat stress.
Beyond structural support, Onechassis solutions prioritize system health through superior airflow management and organized cabling. Proper airflow is critical to preventing heat pockets that can warp motherboards or degrade solder joints over time. These chassis feature high-CFM fans and optimized air channels that direct cool air precisely over the PCIe area. With ample space for cable management, they prevent cable clutter from obstructing airflow or putting tension on connectors, ensuring a stable, durable environment for your expensive hardware.
Frequently Asked Questions
Can a heavy GPU actually crack a motherboard?
Yes, absolutely. The weight of heavy GPUs can cause the motherboard’s PCB (Printed Circuit Board) to flex over time. This flexing can eventually snap the microscopic electrical traces within the board layers or crack the plastic PCIe slot itself, permanently severing the connection.
Will a dead GPU prevent the whole computer from turning on?
Yes, it can. If a GPU has a severe electrical short (like a blown capacitor), the power supply’s safety protection (OCP/SCP) will trip immediately to prevent fire. This cuts power to the entire system, making the PC appear completely dead until the faulty card is removed.
Can I use a different PCIe slot if the main one is broken?
Generally, yes. Most full-sized ATX motherboards have a secondary x16-length slot (often running at x8 or x4 speeds). While you may see a slight decrease in gaming performance due to lower bandwidth, the system will function perfectly fine for diagnostics or daily use.
How do I know if the PCIe slot or the GPU itself is the problem?
The only sure way is cross-testing. Put your GPU in a different computer; if it works, your GPU is fine. Put a different, working GPU in your motherboard; if it fails, your motherboard slot is likely the issue.
Does a short circuit in the GPU always kill the motherboard?
Not always, but it is a high risk. Modern power supplies and motherboards have protection circuits designed to limit damage. However, a massive surge through the PCIe slot can bypass these protections and fry the motherboard chipset or VRMs before the system shuts down.
Summary of Diagnostic Results
Diagnosing whether a GPU has damaged a motherboard is a process of elimination that begins with observation and ends with isolation. If you found physical burns on the slot, the motherboard is certainly dead. If the system fails to post with the “VGA” debug light on, but works perfectly with integrated graphics or a different card, the fault lies in the communication between the original GPU and the slot. Conversely, if your GPU works in another PC but not in any slot on your board, your motherboard has likely suffered a controller failure.
Once you have confirmed the failure, your path forward is clear. If the motherboard slot is physically broken or electrically dead, the board must be replaced, as repairing multi-layer PCB traces is generally impossible for users. If the GPU is the culprit, check your warranty status immediately. Regardless of which component failed, ensure your next build utilizes proper support brackets and a high-quality chassis, like those from Onechassis, to prevent history from repeating itself. Protecting your investment starts with proper physical support and cooling.
