The Mac Mini and Mac Studio are powerful, compact devices, but integrating them into a professional server rack setup can be a challenge without the right tools. A Mac Mini rack mount kit offers a seamless solution, allowing you to securely mount your Apple devices in a rack for better organization, cooling, and accessibility. In this blog, we’ll explore the benefits of using a rack mount kit for Mac Minis and Mac Studios and how it can optimize your workspace.
Introduction to Mac Mini Rack Mounts
What is a Mac Mini Rack?

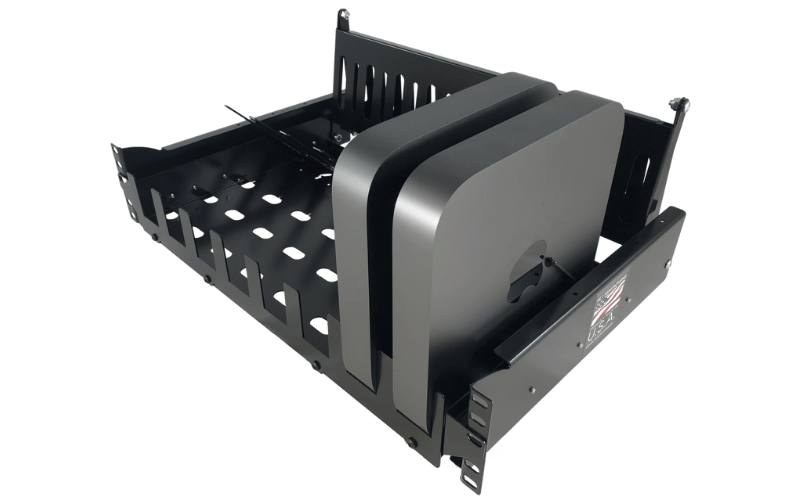
A Mac Mini rack is a specialized mounting solution designed to house one or more Apple Mac Mini computers in a rack-mounted configuration. These racks are typically used in professional environments such as data centers, production studios, and IT setups where space optimization and efficient hardware management are critical.
Rack mounts for Mac Minis are designed to fit standard 19-inch server racks, allowing users to integrate their compact Apple computers into larger IT infrastructures seamlessly. These mounts often include features like secure enclosures, proper ventilation, and cable management options to ensure the devices remain organized and operate efficiently.
By using a Mac Mini rack, businesses can consolidate multiple Mac Minis into a single, centralized location, making it easier to manage and maintain the hardware. This setup is particularly beneficial for organizations that rely on Mac Minis for tasks like server hosting, video editing, or software development.
Benefits of Rack Mounting Your Apple Macs
Rack mounting your Mac Minis offers several advantages, especially for businesses and professionals who require efficient hardware management and scalability. Here are some key benefits:
-
Space Optimization: Rack mounts allow you to stack multiple Mac Minis vertically in a compact space, freeing up valuable desk or floor space. This is particularly useful in environments with limited room, such as small offices or crowded server rooms.
-
Improved Organization: By consolidating your Mac Minis into a single rack, you can keep your hardware neatly organized and easily accessible. Many rack mounts feature built-in cable management systems, reducing clutter and facilitating easier access and maintenance of your devices.
-
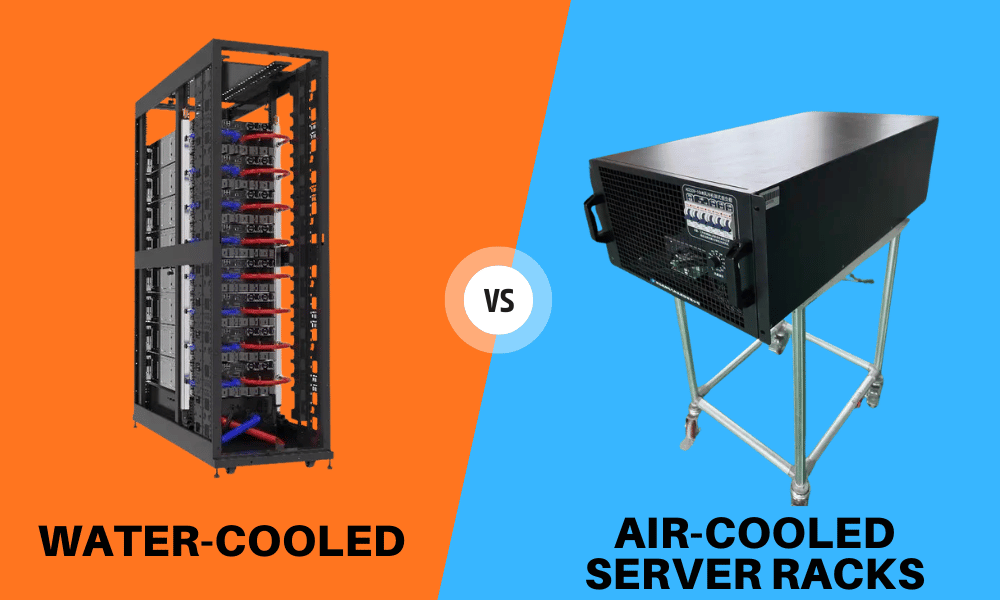
Enhanced Cooling and Ventilation: Rack mounts are designed with proper airflow in mind, ensuring that your Mac Minis remain cool even during intensive workloads. This helps prevent overheating and extends the lifespan of your hardware.
-
Scalability: As your business grows, rack mounting makes it easy to add more Mac Minis to your setup. Install additional units into the rack without requiring significant reconfiguration.
-
Professional Appearance: A rack-mounted setup lends your workspace a clean, professional look, which is particularly important in client-facing environments or production studios.
-
Security: Many rack mounts come with locking mechanisms to secure your Mac Minis, protecting them from theft or unauthorized access.
Overview of Rack Mount Kit Options
When selecting a rack-mount kit for your Mac Minis, it’s essential to consider factors such as compatibility, build quality, and additional features. Here’s an overview of the most common types of rack mount kits available:
-
Single-Unit Rack Mounts: These kits are designed to hold a single Mac Mini and are ideal for small setups or individual use. They often include basic features like ventilation slots and secure mounting brackets.
-
Multi-Unit Rack Mounts: For larger setups, multi-unit rack mounts can house multiple Mac Minis in a single rack. These kits are perfect for businesses or studios that require several devices to work in tandem.
-
Customizable Rack Mounts: Some rack mount kits offer modular designs, enabling you to tailor the configuration to your specific needs. These kits may include adjustable brackets, additional storage compartments, or integrated cable management systems.
-
Specialized Rack Mounts: Certain kits are specifically designed for use in audio production or video editing. These mounts may include features such as noise reduction panels or additional space for peripherals, like external hard drives or audio interfaces.
When selecting a rack-mount kit, ensure it is compatible with your Mac Mini model and meets your specific requirements. Investing in a high-quality rack mount not only protects your hardware but also enhances the overall efficiency and organization of your workspace.
Choosing the Right Rack Mount Kit for Your Setup

Key Features to Consider
When selecting a rack mount kit for your setup, it’s essential to evaluate several key features to ensure compatibility, functionality, and long-term reliability. The right rack mount kit not only organizes your hardware but also enhances its performance and lifespan.
-
Compatibility: Ensure the rack mount kit is specifically designed for your hardware, whether it’s a Mac Mini, Mac Studio, or other devices. Check the dimensions and mounting specifications to avoid any fitting issues.
-
Build Quality: Look for kits made from durable materials like steel or aluminum. A sturdy construction ensures that your devices are securely held in place and protected from physical damage.
-
Ventilation: Proper airflow is critical for preventing overheating. Select a rack-mount kit with ventilation slots or perforated panels to ensure optimal cooling for your devices.
-
Cable Management: A good rack mount kit should include features for organizing cables, such as built-in cable trays or tie-down points. This reduces clutter and makes maintenance easier.
-
Ease of Installation: Opt for a kit that is easy to assemble and install. Some kits come with pre-drilled holes, adjustable brackets, or quick-release mechanisms to simplify the setup process.
-
Security Features: If your setup is in a shared or public space, consider a rack mount kit with locking mechanisms to protect your devices from theft or unauthorized access.
-
Scalability: For growing setups, choose a modular or expandable rack mount kit that allows you to add more devices without requiring a complete overhaul.
Comparing Different Kits for Mac Minis and Studios
Rack mount kits for Mac Minis and Mac Studios come in various designs, each catering to specific needs. Here’s a comparison of the most common options:
-
Standard Rack Mounts: These are basic kits designed to hold one or more devices in a standard 19-inch rack. They are ideal for general use and often include ventilation and cable management features.
-
Stackable Rack Mounts: These kits allow you to stack multiple Mac Minis or Studios vertically, maximizing space efficiency. They are perfect for setups with limited rack space or high-density configurations.
-
Customizable Rack Mounts: Some kits offer adjustable brackets and modular designs, allowing you to configure the rack to fit your specific requirements. These are great for setups that include additional peripherals like external drives or audio equipment.
-
Specialized Rack Mounts: Designed for specific use cases, such as audio production or video editing, these kits may include noise-dampening panels, shock absorption, or extra compartments for accessories.
When comparing kits, consider your current and future needs. For example, if you plan to expand your setup, a modular or stackable kit may be more suitable than a standard one.
Understanding 1U vs. 2U Rack Mounts
Rack mount kits are often categorized by their height in rack units (U), with 1U and 2U being the most common options for Mac Minis and Studios. Understanding the difference between these sizes is crucial for choosing the right kit for your setup.
-
1U Rack Mounts: A 1U rack mount is 1.75 inches in height and is designed to hold a single row of devices. These mounts are compact and space-efficient, making them ideal for setups with limited rack space. They are commonly used for housing one or two Mac Minis side by side.
-
2U Rack Mounts: A 2U rack mount is 3.5 inches in height and provides additional space for larger devices or multiple rows of equipment. These mounts are better suited for setups that require more ventilation, additional accessories, or higher-density configurations.
When deciding between 1U and 2U mounts, consider the number of devices you need to house, the available rack space, and any additional features you may require, such as enhanced cooling or accessory storage.
By carefully evaluating these factors, you can select a rack mount kit that meets your specific needs, ensuring a well-organized, efficient, and scalable setup.
Installation Process for Mac Mini Rack Mounts

Step-by-Step Installation Guide
Installing a Mac Mini rack mount is a straightforward process, but it requires careful attention to detail to ensure the hardware is securely and efficiently mounted. Follow these steps for a successful installation:
-
Prepare the Rack: Begin by ensuring your server rack is clean, stable, and ready for installation. Verify that the rack conforms to the standard 19-inch dimensions and provides sufficient space for the rack mount kit and Mac Minis.
-
Unbox and Inspect the Kit: Unpack the rack mount kit and inspect all components for any damage or missing parts. Familiarize yourself with the assembly instructions provided by the manufacturer.
-
Attach Mounting Brackets: Secure the mounting brackets to the rack using the screws and hardware included in the kit. Ensure the brackets are level and aligned with the rack’s rails to avoid uneven installation.
-
Position the Mac Mini: Place the Mac Mini into the designated slot or tray within the rack mount. Some kits may include foam padding or clamps to hold the device securely in place. Adjust these as needed to prevent movement during operation.
-
Secure the Device: Use the provided screws, straps, or locking mechanisms to secure the Mac Mini within the rack mount. Double-check that the device is firmly held in place to avoid any risk of dislodging.
-
Connect Cables: Route the power and data cables through the rack’s cable management system. Use cable ties or clips to keep the cables organized and prevent tangling. Ensure all connections are secure and accessible for future maintenance.
-
Test the Setup: Power on the Mac Mini and verify that it operates correctly. Check for proper airflow and ensure the device is not overheating. Make any necessary adjustments to the rack mount or cooling system.
Tools and Accessories Needed
To install a Mac Mini rack mount, you’ll need a few essential tools and accessories. Having these items on hand will make the process smoother and more efficient:
- Screwdriver Set: A set of Phillips and flathead screwdrivers for securing brackets and screws.
- Rack Screws and Cage Nuts: These are often included with the rack mount kit but may need to be purchased separately for some racks.
- Cable Ties or Velcro Straps: For organizing and securing cables within the rack.
- Level: To ensure the rack mount is installed evenly and aligned properly.
- Foam Padding or Clamps: Some kits include these for added stability, but they can also be purchased separately if needed.
- Power and Data Cables: Ensure you have the appropriate cables for connecting the Mac Mini to power sources and network devices.
Common Challenges and Troubleshooting
While installing a Mac Mini rack mount is generally straightforward, you may encounter some challenges. Here are common issues and troubleshooting tips:
-
Misaligned Brackets: If the mounting brackets don’t align with the rack’s rails, double-check the measurements and ensure the brackets are installed at the correct height. Use a level to verify alignment.
-
Loose Devices: If the Mac Mini feels loose within the rack mount, adjust the clamps or padding to provide a snug fit. Ensure all screws and locking mechanisms are tightened securely.
-
Cable Clutter: Poor cable management can lead to tangling and difficulty accessing connections. Use cable ties or Velcro straps to bundle cables neatly and route them through the rack’s cable management system.
-
Overheating: If the Mac Mini overheats after installation, check the ventilation and airflow within the rack. Ensure the rack mount has adequate ventilation slots and that the cooling system is functioning properly.
-
Missing Hardware: If screws or other components are missing from the kit, contact the manufacturer for replacements or purchase compatible parts from a hardware store.
By following these steps and addressing potential challenges, you can ensure a smooth installation process and a well-organized, efficient Mac Mini rack mount setup.
Cable Management Solutions for Rack-Mounted Macs
Importance of Cable Management in Rack Setups
Effective cable management is a critical aspect of maintaining a clean, efficient, and functional rack-mounted setup for Mac Minis or other devices. Poorly managed cables can lead to a host of issues, including restricted airflow, increased risk of hardware damage, and difficulty in troubleshooting or upgrading equipment.
In rack-mounted environments, cables often connect multiple devices, such as power supplies, network switches, and external storage units. Without proper organization, these cables can become tangled, making it challenging to identify and access specific connections. This not only wastes time during maintenance but also increases the likelihood of accidental disconnections or damage to sensitive ports.
Additionally, proper cable management contributes to better airflow within the rack. Tangled or obstructed cables can block ventilation paths, leading to overheating and reduced performance of your Mac Minis or other hardware. By keeping cables neatly arranged, you ensure that cooling systems can operate efficiently, extending the lifespan of your equipment.
Best Practices for Organizing Cables
Organizing cables in a rack-mounted setup requires a systematic approach to ensure both functionality and aesthetics. Here are some best practices to follow:
-
Plan Your Layout: Before connecting any cables, map out the placement of your devices and the routing of cables. Identify the shortest and most efficient paths for each connection to minimize clutter.
-
Label Cables: Use cable labels or color-coded tags to identify each connection. This makes it easier to trace cables during troubleshooting or when adding new devices to the rack.
-
Bundle Cables: Group related cables together using cable ties, Velcro straps, or spiral wraps. Avoid over-tightening, as this can damage the cables or make them difficult to adjust later.
-
Separate Power and Data Cables: Keep power cables and data cables on opposite sides of the rack to reduce electromagnetic interference (EMI), which can affect the performance of your devices.
-
Use Cable Management Panels: Install horizontal or vertical cable management panels to guide and secure cables along the rack. These panels help maintain a clean and organized appearance while preventing cables from sagging or tangling.
-
Allow for Slack in Your Cables: Leave a small amount of slack in your cables to accommodate future adjustments or reconfigurations. However, avoid excessive slack, as it can create unnecessary clutter.
-
Regular Maintenance: Periodically inspect and reorganize your cables to ensure they remain tidy and functional. Replace any damaged cables and update labels as needed.
Using Cable Management Accessories
Cable management accessories are invaluable tools for keeping your rack-mounted setup organized and efficient. Here are some commonly used accessories and their benefits:
-
Cable Ties and Velcro Straps: These are essential for bundling cables together. Velcro straps are particularly useful because they can be easily adjusted or removed without damaging the cables.
-
Cable Management Panels: Available in horizontal and vertical designs, these panels provide structured pathways for routing cables. They often include hooks, loops, or channels to secure cables in place.
-
Cable Trays: Mounted beneath or alongside the rack, cable trays offer additional space for routing and organizing cables. They are ideal for managing longer cable runs.
-
Cable Labels and Tags: These accessories help you identify cables quickly, reducing the time spent tracing connections during maintenance or upgrades.
-
Brush Panels: Installed at the front or rear of the rack, brush panels allow cables to pass through while keeping the opening sealed. This helps maintain airflow and prevents dust from entering the rack.
-
Cable Clips and Clamps: These small accessories secure individual cables to the rack frame, preventing them from sagging or becoming tangled.
By combining these accessories with best practices, you can create a well-organized and efficient cable management system for your rack-mounted Macs. This not only improves the overall functionality of your setup but also enhances its appearance and ease of maintenance.
Setting Up a Mobile Rackmounting Rig
A mobile rackmounting rig is an essential solution for professionals who require a portable yet robust setup for their equipment. Whether you’re a video editor, sound engineer, or IT specialist, a mobile rack provides a streamlined way to organize and transport your gear. By securely housing your devices in a rack, you can ensure better cable management, improved cooling, and enhanced protection during transit. Setting up a mobile rackmounting rig involves careful planning, from selecting the right rack size to configuring the equipment layout for optimal performance.
Benefits of a Mobile Rack Setup
A mobile rack setup offers numerous advantages, making it a preferred choice for professionals on the go. Here are some key benefits:
-
Portability and Convenience
Mobile racks are designed with portability in mind, often featuring wheels or handles for easy transportation. This makes them ideal for professionals who frequently move between locations, such as live event technicians or on-site IT teams. -
Enhanced Equipment Protection
Rackmounting your devices ensures they are securely fastened, reducing the risk of damage during transit. Many mobile racks also come with shock-absorbing features to protect sensitive equipment like servers or audio interfaces. -
Efficient Space Utilization
A rackmounting rig allows you to stack multiple devices vertically, saving valuable space. This is particularly useful in tight workspaces or when transporting equipment in compact vehicles. -
Improved Cable Management
Mobile racks often include built-in cable management systems, helping you keep cables organized and reducing the risk of tangling or accidental disconnections. -
Customizability
With a variety of rack sizes and configurations available, you can tailor your setup to meet your specific needs. From power distribution units to cooling fans, mobile racks can be customized to optimize performance.
How to Configure Your Mobile Rack
Configuring a mobile rack requires careful consideration of your equipment and workflow. Follow these steps to set up your rig effectively:
-
Choose the Right Rack Size
Select a rack that accommodates your current equipment while leaving room for future expansion. Racks are typically measured in “U” units, with each U representing 1.75 inches of vertical space. -
Plan Your Layout
Arrange your devices in a logical order, prioritizing frequently accessed equipment at the top for convenience. Place heavier items, such as servers or power amplifiers, at the bottom to maintain stability. -
Install Power Distribution Units (PDUs)
A PDU ensures that all your devices receive adequate power. Opt for a PDU with surge protection to safeguard your equipment from power fluctuations. -
Incorporate Cooling Solutions
Proper ventilation is crucial for preventing overheating. Install cooling fans or leave empty spaces between devices to allow for better airflow. -
Secure Your Equipment
Use rack-mount brackets or rails to fasten your devices securely. Double-check that all screws and fasteners are tightened to prevent movement during transit. -
Organize Cables
Use cable ties or Velcro straps to bundle cables neatly and securely. Label each cable to facilitate easier troubleshooting and reconfiguration.
Tips for Transporting Your Rack-Mounted Macs
Transporting rack-mounted Macs or other sensitive equipment requires extra care to ensure their safety. Here are some tips to make the process smoother:
-
Use Shock-Absorbing Cases
Invest in a mobile rack with shock-absorbing features to protect your Macs from vibrations and impacts during transit. -
Secure All Components
Double-check that all devices are securely fastened to the rack. Loose equipment can shift during transport, causing damage. -
Protect Ports and Cables
Disconnect any external cables and cover exposed ports to prevent dust or debris from entering—store cables separately in a dedicated compartment. -
Monitor Temperature
Avoid exposing your rack to extreme temperatures. If you’re transporting it in a vehicle, ensure the environment is climate-controlled. -
Plan for Accessibility
Arrange your equipment so that essential components are easily accessible upon arrival. This minimizes setup time and allows you to get to work quickly.
By following these guidelines, you can create a mobile rackmounting rig that is both functional and reliable, ensuring your equipment remains safe and organized wherever your work takes you.
Optimizing Your Mac Mini Rack Setup
Creating an efficient and reliable rack setup for your Mac Mini requires a balance of functionality, organization, and future-proofing. Please start by selecting a rack that fits your specific needs, ensuring it has adequate space for your current devices and potential upgrades. Proper cable management is crucial for maintaining a clean and professional appearance while also minimizing the risk of connectivity issues. Additionally, incorporating cooling solutions, such as fans or ventilation panels, can help prevent overheating, especially when running resource-intensive applications. By taking these steps, you can optimize your Mac Mini rack setup for both performance and longevity.
Final Thoughts on Rack Mounting
Rack mounting offers a practical solution for professionals who need to organize and protect their equipment. Beyond the physical benefits, such as space-saving and enhanced portability, a well-designed rack setup can improve workflow efficiency by keeping all devices easily accessible. However, it’s essential to regularly assess your setup to ensure it continues to meet your evolving needs. This might involve upgrading to a larger rack, adding new components, or reconfiguring the layout to accommodate changes in your workflow. By staying proactive, you can maximize the value of your rack-mounted system.
Future Trends in Rack Mount Technology
The world of rack mount technology is constantly evolving, with new innovations aimed at improving efficiency, security, and adaptability. One emerging trend is the integration of smart features, such as remote monitoring and control, which allow users to manage their equipment from anywhere. Additionally, modular designs are becoming increasingly popular, enabling users to customize their racks with interchangeable components. Sustainability is also a growing focus, with manufacturers developing eco-friendly materials and energy-efficient cooling systems. Keeping an eye on these trends can help you stay ahead of the curve and ensure your setup remains cutting-edge.
Resources for Further Information
For those looking to deepen their understanding of rack mounting and related technologies, there are numerous resources available:
- Manufacturer Guides: Many rack manufacturers provide detailed setup and maintenance guides tailored to their products.
- Online Forums: Communities like Reddit and specialized tech forums are great places to ask questions and share experiences with other professionals.
- YouTube Tutorials: Video walkthroughs can offer step-by-step instructions for setting up and optimizing your rack.
- Industry Blogs: Websites dedicated to IT and tech trends often feature articles on the latest advancements in rack mount technology.
- Professional Training: Consider enrolling in workshops or certification programs to gain hands-on experience and expert insights.
By leveraging these resources, you can enhance your knowledge and make informed decisions about your rack-mounted setup.
Frequently Asked Questions
Q: What is a rack mount kit for Mac Minis?
A: A rack mount kit for Mac Minis is a hardware accessory designed to securely house and organize one or more Mac Mini units within a standard 19-inch server rack. These kits typically include mounting brackets, screws, and sometimes additional components like rails or shelves to ensure a stable and efficient installation in a professional environment.
Q: Can I rack mount two Mac Minis together?
A: Yes, you can rack mount two Mac Minis together using a rack mount kit specifically designed for multiple units. This setup maximizes space efficiency in server rooms or data centers while ensuring proper ventilation and easy access to the devices.
Q: What tools do I need to install a rack mount for Mac Minis?
A: To install a rack mount for Mac Minis, you’ll generally need a Phillips head screwdriver, the screws included with the rack mount kit, and possibly a drill if additional hardware installation is required. Double-check that all components are included in the kit before starting the installation process.
Q: How do I ensure proper airflow when rack mounting multiple Macs?
A: To maintain proper airflow, leave sufficient space between units and use rack mount shelves with ventilation openings. Avoid blocking vents and consider installing cooling fans or airflow management accessories to keep your equipment at optimal operating temperatures.
Q: Are there specific rack units for Mac Studios?
A: Yes, Mac Studios can be rack mounted, but they often require custom rack mount kits tailored to their unique size and design. Always verify compatibility with your specific model to ensure a secure fit and adequate ventilation.
Q: What is the maximum number of Mac Minis I can rack mount?
A: The maximum number of Mac Minis you can rack mount depends on the size of your rack and the design of the rack mount kit. For instance, a 4U rack mount kit can typically hold several Mac Minis, depending on the layout and any additional hardware included.
Q: Do I need to worry about power connections when rack mounting?
A: Yes, power connections are an important consideration when rack mounting multiple Mac Minis. Ensure you have enough power outlets and use high-quality power strips or connectors to manage the devices. A power management solution can also help streamline power delivery and prevent overloads.
Q: Can I use USB-C or HDMI connections when rack mounting Macs?
A: Absolutely, USB-C and HDMI connections can be used when rack mounting Macs. Make sure your setup allows easy access to the ports, and use durable, high-quality cables to connect external displays and peripherals without compromising performance.
Q: Where can I find rack mount kits for Apple Mac Minis?
A: Rack mount kits for Apple Mac Minis are available from various retailers, including online platforms like MyElectronics and specialized hardware stores. Compare features, compatibility, and customer reviews to select the best kit for your needs.
Conclusion
A Mac Mini rack mount kit is the perfect accessory for professionals looking to integrate their Apple devices into a streamlined, organized server rack setup. By improving accessibility, cooling, and space efficiency, these kits ensure your Mac Mini or Mac Studio operates at its best. Upgrade your workspace with a rack mount kit and enjoy a more professional and efficient IT environment.